Patterns created with melody source type nodes can be exported into a MIDI file, which will be saved on your local machine.
Note: Since our export logic is very new, it is currently available only for the sequencer-type nodes such as Sequencer Node and Drum Sequencer Node. Therefore, we introduce the export feature from the perspective of the Sequencer Node..
To start, fire up AudioNodes Online (or download the desktop version for faster performance if you need it).
Create A Pattern
- Right click on empty area
- On touch devices: touch and hold on empty area, until the progress circle completes
- Select Melody Sources category
- Select Sequencer
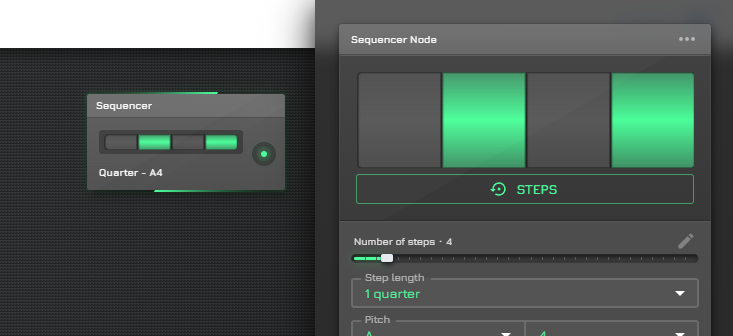
- Double-click the new Sequencer Node, then your will see the step editor (or select Properties, and which will open the properties panel)
- On touch devices: tap the new Sequencer Node, tap the gear icon in the header, then properties panel will be opened
- Let’s create two steps (with quarter step length which is the default one) by clicking 1st two grey areas (hereby called steps)
- On touch devices: short tap the grey areas
Additional: Listen To Your Beats
- Right click on an empty area
- On touch devices: touch and hold on empty area, until the progress circle completes
- Select Audio Sources category
- Select Noise Generator
- Connect your Sequencer Node to the Noise Generator Node:
- Click/tap on the small green dot to the right of your Sequencer Node
- Click/tap on the small green dot to the left of your Noise Generator Node
- Again, right click on an empty area
- On touch devices: touch and hold on empty area, until the progress circle completes
- Select Outputs category
- Select Audio Destination Node
- Connect your Noise Generator Node to the Audio Destination Node:
- Click/tap on the small blue dot to the right of your Sequencer Node
- Click/tap on the small blue dot to the left of your Audio Destination Node
Now, make sure you headphone is not set to a high level – then hit the play button in the upper header, you can hear your steps playing.
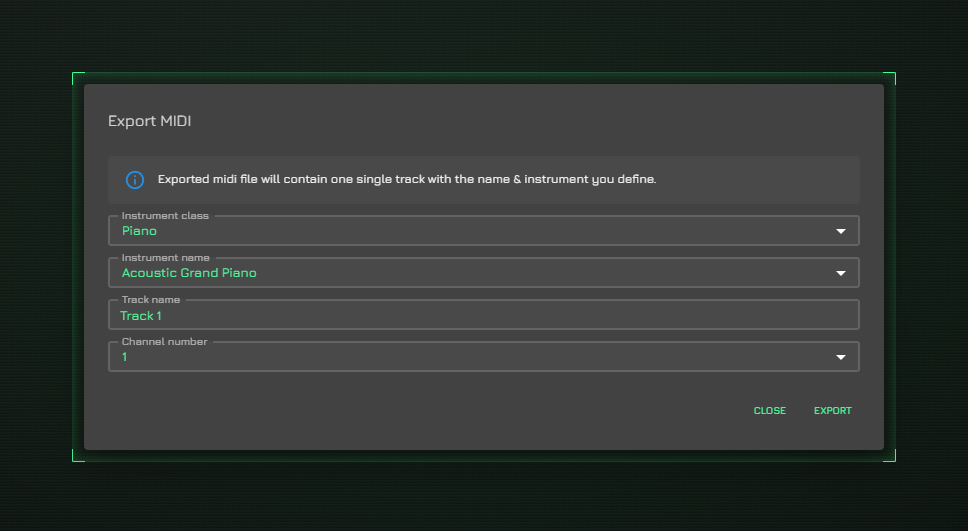
Final Step: Render
- Double-click the new Sequencer Node to open the properties panel (if you closed it)
- On touch devices: tap the new Sequencer Node, tap the gear icon in the header, then properties panel will be opened
- Click/tap on the Export to file button with a cloud icon
- On the opened export dialog, click/tap the Export button
- Select a folder to save, and a meaningful filename
- “Rendering complete” message will appear in an info alert